
Pretty sure this is my first tutorial. I'm always making things from other people's tutorials and I'm so grateful for them. Finally, I have something original to share! That's partly a lie because I didn't come up with these on my own. My sister-in-law made them for Peyton's baby shower and I've seen her make them for others, too. But this was MY first time making them. I actually googled clothespin babies to see if there was a tutorial out there and I couldn't find one. Maybe this will put my little blog on the map...ha! I don't know if that's what they're actually called, but that's what I'm calling them. So, here goes!
These cute things serve two purposes:
1) It's a party favor. Every guest takes one home and puts it on their fridge (there's a magnet on the back). When the baby announcement comes you have somewhere to put it. Genius, right?
2) It's a game. Every guest gets one when they walk in the door and they clip it to their clothing somewhere. There's one rule - You cannot say baby and you cannot say whatever the baby's name is (if it's been decided). If anyone catches you doing so they can take ALL of your pins. Whoever has the most at the end of the shower wins.
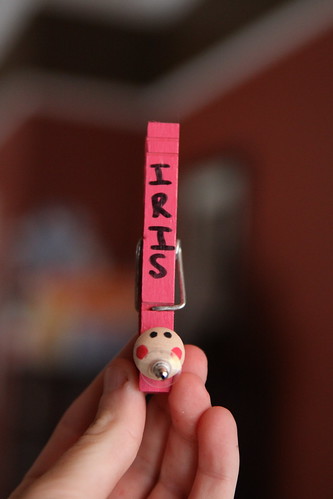
Here's a finished one up close. You probably don't actually need a tutorial for this, but you're getting it anyway. There's only 7 steps.
1) It's a party favor. Every guest takes one home and puts it on their fridge (there's a magnet on the back). When the baby announcement comes you have somewhere to put it. Genius, right?
2) It's a game. Every guest gets one when they walk in the door and they clip it to their clothing somewhere. There's one rule - You cannot say baby and you cannot say whatever the baby's name is (if it's been decided). If anyone catches you doing so they can take ALL of your pins. Whoever has the most at the end of the shower wins.
Here's a finished one up close. You probably don't actually need a tutorial for this, but you're getting it anyway. There's only 7 steps.
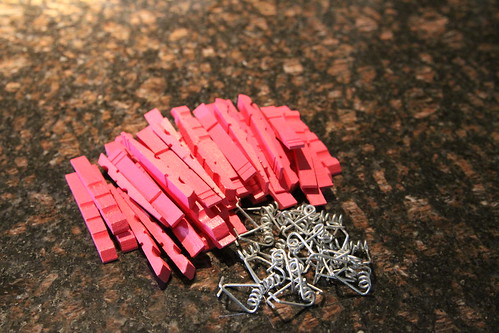
Step 1: Buy a bag of clothespins and paint them (I used spray paint). Obviously pink for girl or blue for boy, but you could do green or yellow for someone who isn't finding out the sex.
I took the clothespins apart to paint them. It wasn't hard.
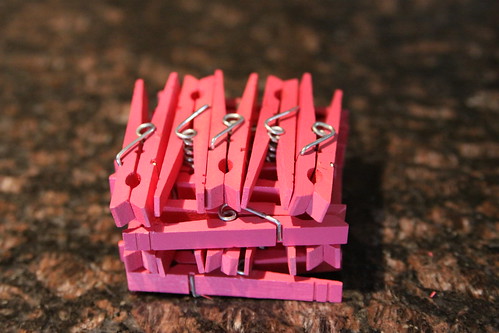
Step 2: Put them back together.
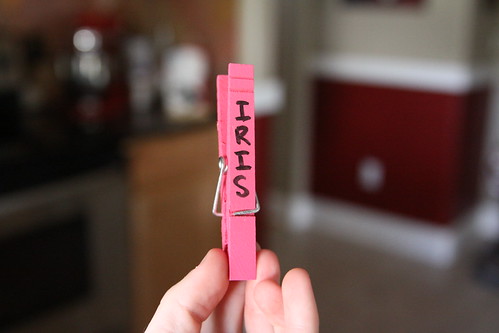
Step 3: Write the baby's name on them or just write baby if a name hasn't been chosen. I'd recommend a fine point sharpie to write on them. I didn't have one and it just looks sloppy to me.
Step 4: Glue a magnet on the back. You can buy it in strips or a ring. The ring was cheaper so I bought that. I tried a couple different gluing methods, but hot glue worked best.

Buy a bag of earring backs (they'll be the pacifier) from JoAnns/craft store.
Buy a bag of wood buttons (Joann's or Home Depot/Lowes carries them).

Step 5: Draw the eyes and cheeks.
Step 6: Hot glue the earring back.
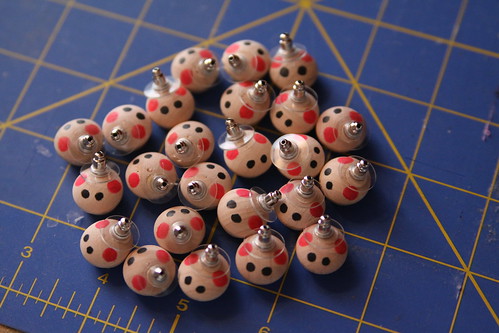
Step 7: Then hot glue the button toward the bottom of the clothespin.
And you're done! How easy was that!


3 comments:
You did a great job and they are super cute!!! I like the tutorial too! You should do more!!
Oh they are adorable!!!
Super cute! Definitely will keep it in mind for the next baby shower. Love the idea. And I agree-- you should do more tutorials. :)
Post a Comment